Download VirtualBox
VirtualBox is free, open-source software that runs virtual machines. You install it once on the computer that will host RepairAmigo. Pick a computer that stays on during business hours.
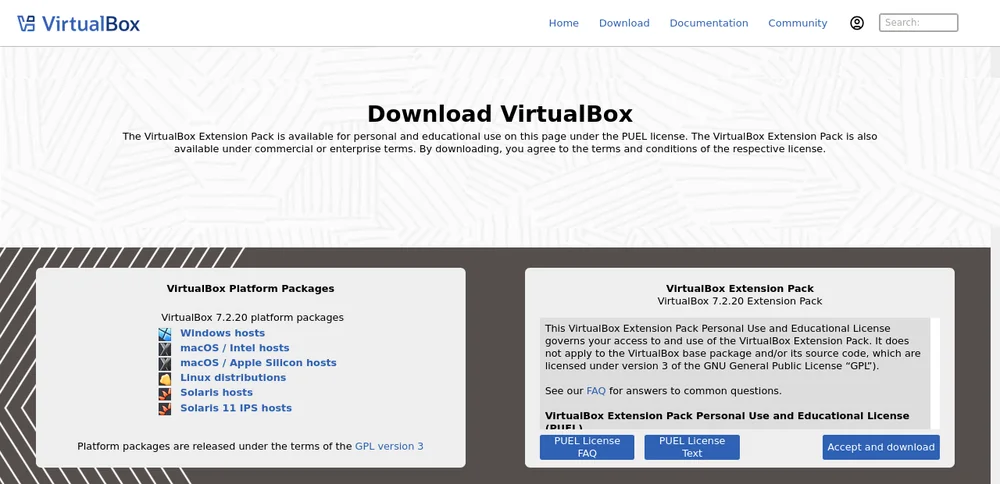
- Open the official download page: virtualbox.org/wiki/Downloads.
- Under VirtualBox Platform Packages, click the package for your computer:
Your computer Click You get Windows 10 / 11 Windows hosts an installer .exeMac with an Intel processor macOS / Intel hosts a disk image .dmgLinux (Ubuntu, Debian, Fedora…) Linux distributions, then your distribution and version a .debor.rpmpackage - The Extension Pack on the same page is optional. RepairAmigo does not need it. It is under a separate license, so skip it unless you know you need it.
Install VirtualBox
Windows
- Double-click the file you downloaded (it looks like
VirtualBox-7.x.x-…-Win.exe). If Windows asks “Do you want to allow this app to make changes to your device?”, click Yes. - On the welcome screen, click Next.
- On Custom Setup, leave the default features selected and click Next.
- A Network Interfaces warning says your network will disconnect for a moment. Save any open work, then click Yes.
- If you see Missing Dependencies (Python Core / win32api), click Yes to continue. RepairAmigo does not need them.
- Click Install. When Windows asks to install device software from Oracle, click Install each time.
- Click Finish. The VirtualBox Manager opens.
If the installer says the Microsoft Visual C++ Redistributable is missing, install the latest x64 version from Microsoft’s website and run the VirtualBox installer again.
macOS (Intel only)
Open the .dmg, double-click VirtualBox.pkg and follow the installer. If macOS blocks the installation, open System Settings → Privacy & Security, click Allow next to the message about Oracle, and run the installer again.
Linux
Install the package you downloaded, for example on Ubuntu/Debian:
sudo apt install ./virtualbox-7.*.deb
sudo usermod -aG vboxusers $USER
Log out and back in after the second command. If your computer uses Secure Boot, the installer may ask you to sign the VirtualBox kernel modules.
Turn on virtualization in the BIOS (VT-x / AMD-V)
Most computers have it on already. If VirtualBox later says “VT-x is disabled in the BIOS” or “AMD-V is disabled”:
- Restart the computer and open the BIOS/UEFI setup (usually by pressing Del, F2, F10 or Esc right after power on).
- Find Intel Virtualization Technology (VT-x) or SVM Mode (AMD-V), often under Advanced, CPU Configuration or Security, and set it to Enabled.
- Save and exit (often F10).
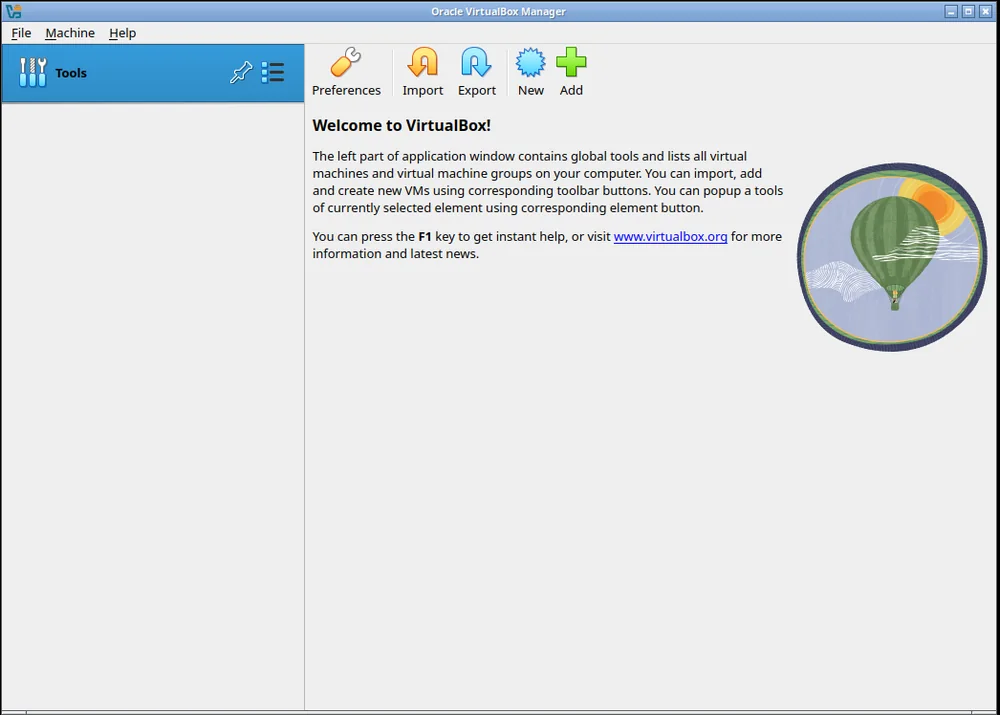
Import the RepairAmigo virtual machine
RepairAmigo comes as one file, RepairAmigo.ova, which you import into VirtualBox.
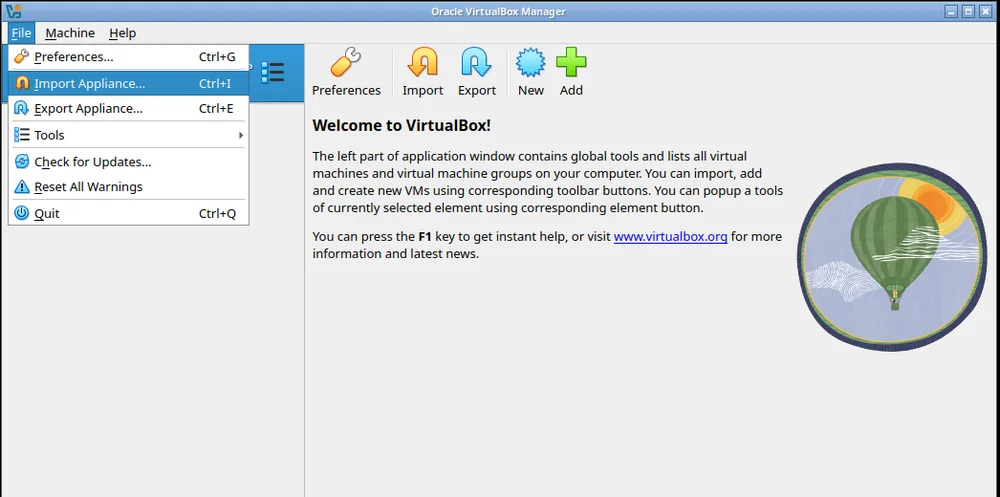
- Open VirtualBox and click File → Import Appliance… (or press Ctrl+I).
- Leave Source on Local File System. Click the folder icon next to File, choose
RepairAmigo.ovaand click Next.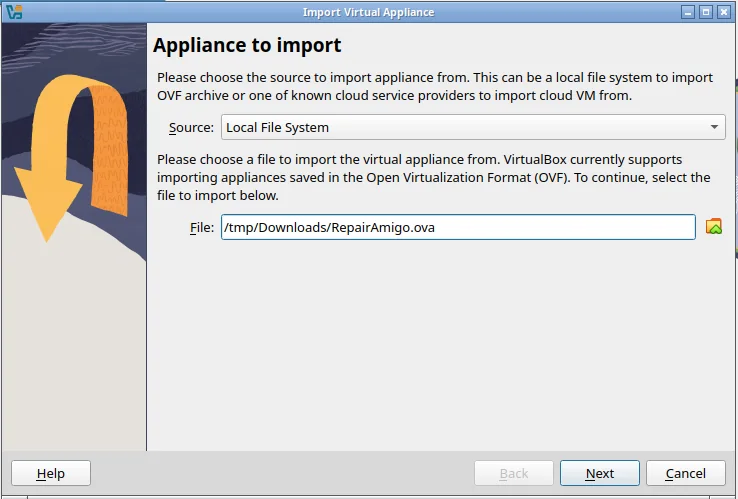
- Check the Appliance settings:
- RAM: 8192 MB (8 GB). Double-click the value to change it.
- CPU: 8. Double-click the value to change it.
- MAC Address Policy: Generate new MAC addresses for all network adapters.
- Leave Import hard drives as VDI checked.
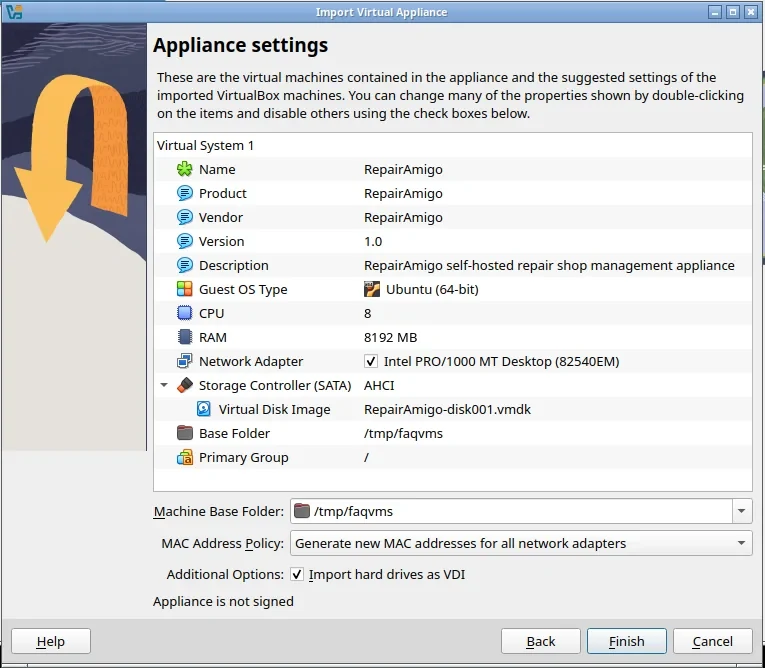
- Click Finish (called Import in older versions) and wait for the progress bar to complete. This can take a few minutes.
- RepairAmigo now appears in the list on the left.
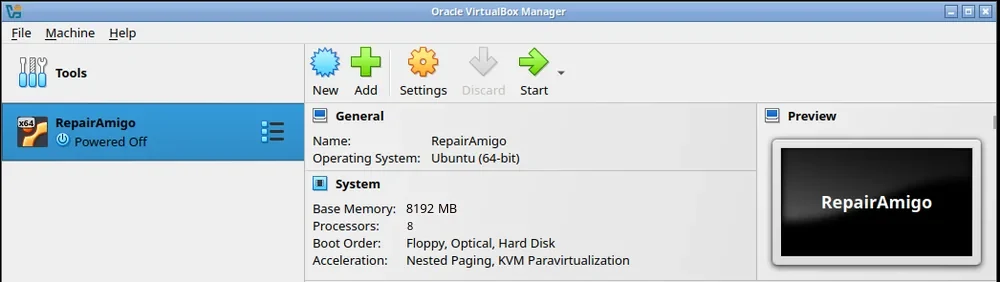
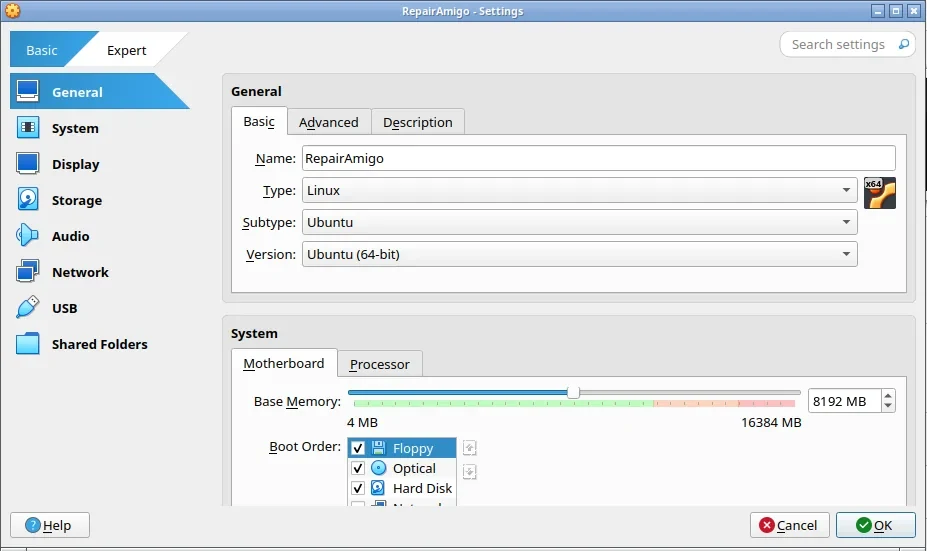
To change memory or processors later, shut the VM down, select it, click Settings → System and adjust Base Memory (and the Processor tab).
Connect it to your shop network (Bridged Adapter)
Why: by default VirtualBox hides a VM behind your computer (NAT), so other computers, tablets and phones in the shop cannot reach it. With a Bridged Adapter, the VM joins your shop network like any other computer and gets its own IP address from your router, so every device in the shop can open RepairAmigo.
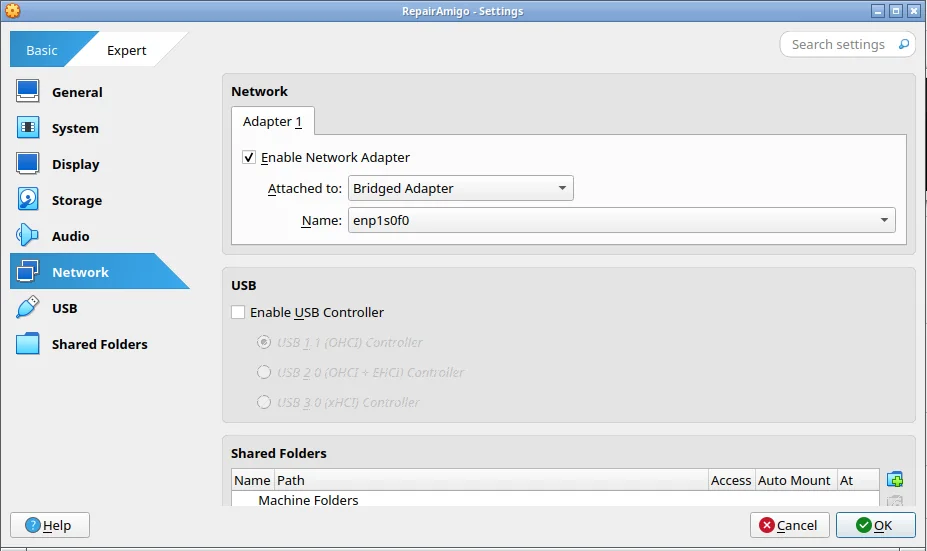
- Make sure the VM is powered off. Select RepairAmigo and click Settings.
- Click Network. On Adapter 1, check Enable Network Adapter.
- Set Attached to to Bridged Adapter.
- In Name, pick the network card this computer uses for your shop network: the Ethernet adapter (recommended) or the Wi-Fi adapter. On Windows it is usually called something like “Intel(R) Ethernet…” or “Realtek PCIe GbE…”.
- Click OK.
Start and stop the VM
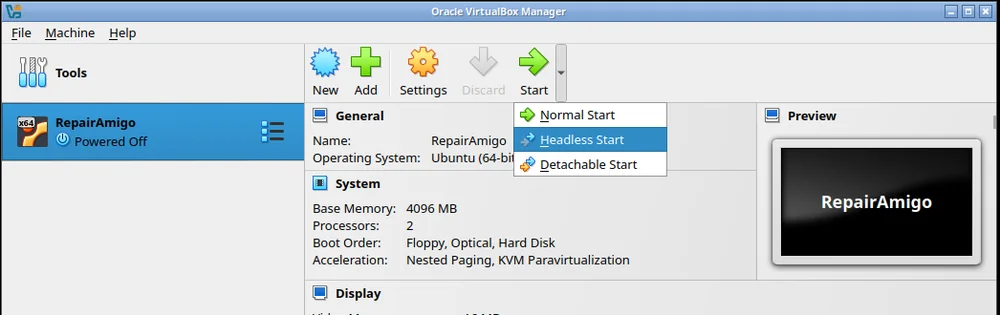
- Select RepairAmigo and click the small arrow next to Start:
- Normal Start opens a window with the VM’s screen. Use this the first time, so you can see the IP address.
- Headless Start runs the VM in the background with no window. Good for everyday use.
- Wait 1 to 2 minutes until the VM’s screen shows the RepairAmigo banner with the address to open, for example
open http://192.168.1.50/ in your browser, followed by a login prompt. You don’t log in there: open that address in a web browser on any computer in the shop (step 7). - To shut down, right-click the VM and choose Stop → ACPI Shutdown (in the VM window: Machine → ACPI Shutdown). This closes the database cleanly.
Start RepairAmigo automatically
- Windows: create a file named
RepairAmigo.batcontaining the line below, and put it in your Startup folder (press Win+R, typeshell:startup, press Enter)."C:\Program Files\Oracle\VirtualBox\VBoxManage.exe" startvm "RepairAmigo" --type headless
- Linux: add
@reboot VBoxManage startvm "RepairAmigo" --type headlessto your user’s crontab (crontab -e). - macOS: run the same
VBoxManage startvmcommand from a Login Item. - Turn off sleep on the host computer (Windows: Settings → System → Power → Sleep: Never). A sleeping computer pauses RepairAmigo for everyone.
Find the VM’s IP address
- Look at the VM’s screen. After it starts, RepairAmigo shows the shop’s LAN IP address and the setup address, for example
http://192.168.1.50/repairs/inshop2/setup/. If you used Headless Start, right-click the VM and choose Show. - Or check your router. Open your router’s admin page and look at the DHCP client list (also called Attached devices or Connected clients). Look for a device named repairamigo, or a MAC address starting with
08:00:27(VirtualBox).
Use RepairAmigo
RepairAmigo is used from a web browser on any computer, tablet or phone connected to the same shop network. Everything, including your data, is managed inside the app.
First time: Setup and the Owner account
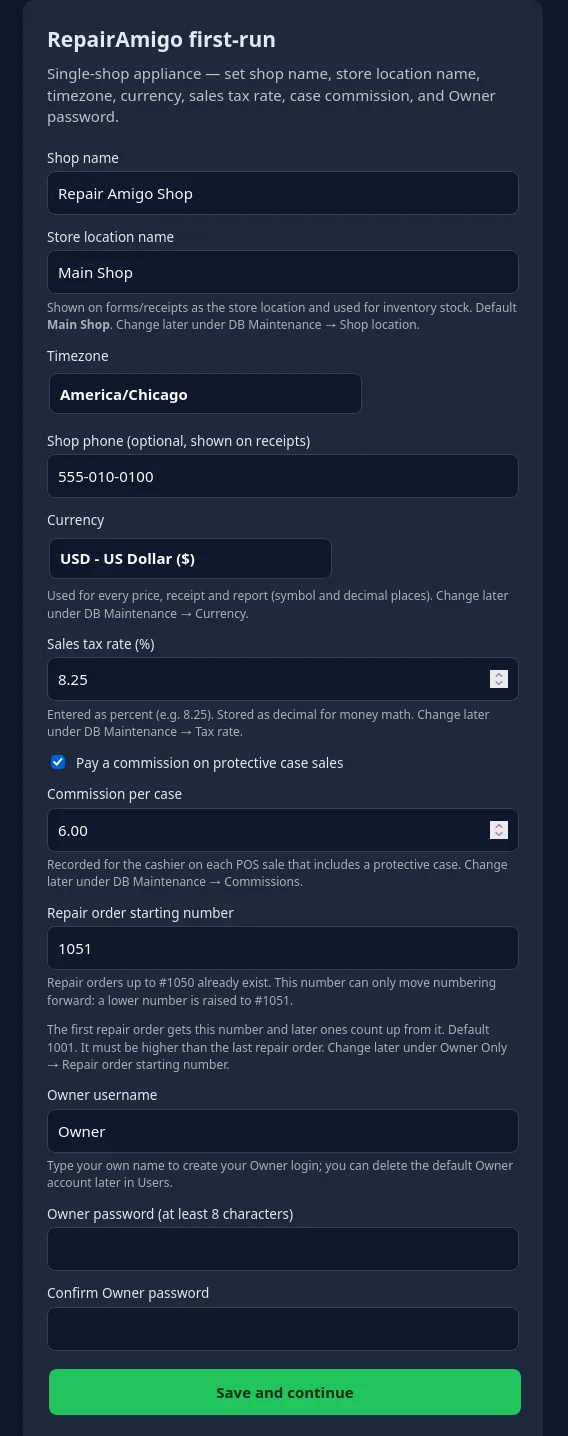
- On any device in the shop, open
http://<VM-IP>/repairs/inshop2/setup/, for examplehttp://192.168.1.50/repairs/inshop2/setup/. - Enter your shop name and time zone, and create the Owner account and password.
- Keep the Owner password safe. The Owner is the most powerful account: it manages users, settings and your data.
Every day: sign in
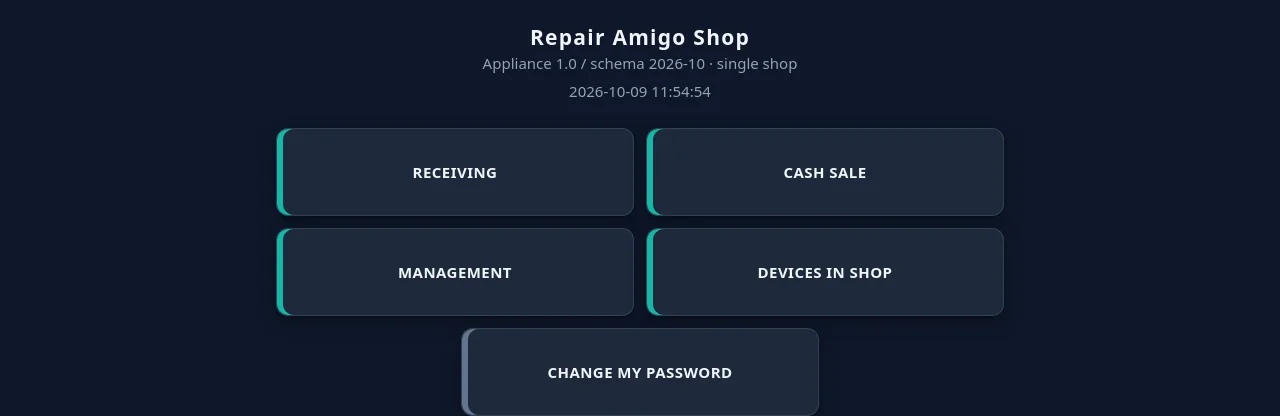
- Open
http://<VM-IP>/repairs/inshop2/and sign in with your user. - Bookmark it (or “Add to Home Screen” on a phone or tablet) on every device the shop uses.
- The Owner can add Managers and Technicians from the Management menu.
Your data: export and import
Only the Owner can do this. Go to Main menu → Management → Owner Only.
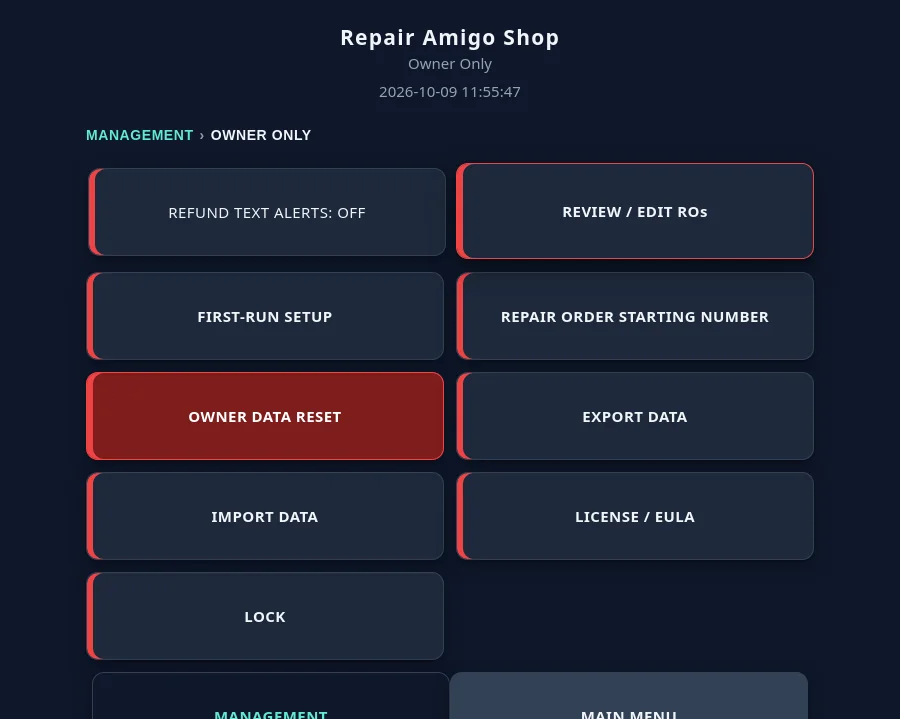
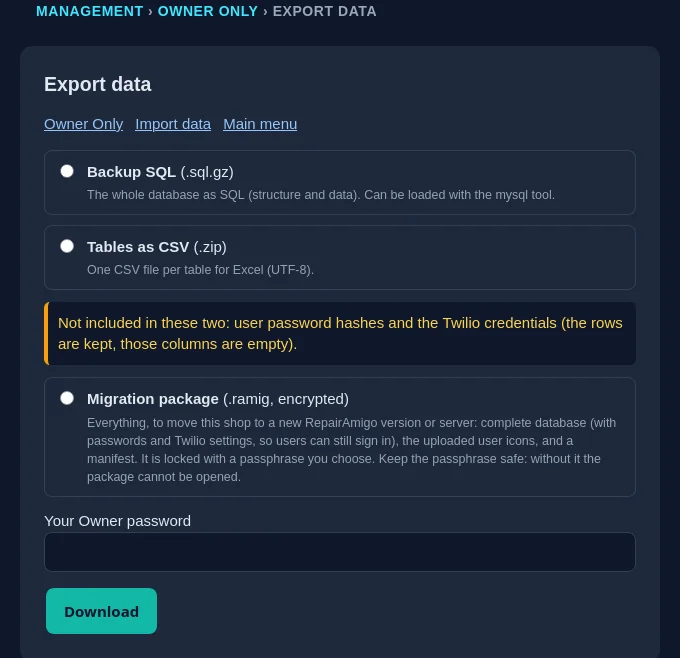
Export Data lets you download:
- Backup SQL (.sql.gz): the whole database. Good for your own records.
- Tables as CSV (.zip): one spreadsheet file per table, for Excel.
- Migration package (.ramig, encrypted): everything needed to move your shop to a new RepairAmigo version or computer. You choose a passphrase.
For security, the SQL and CSV exports leave out user password hashes and the texting (Twilio) credentials.
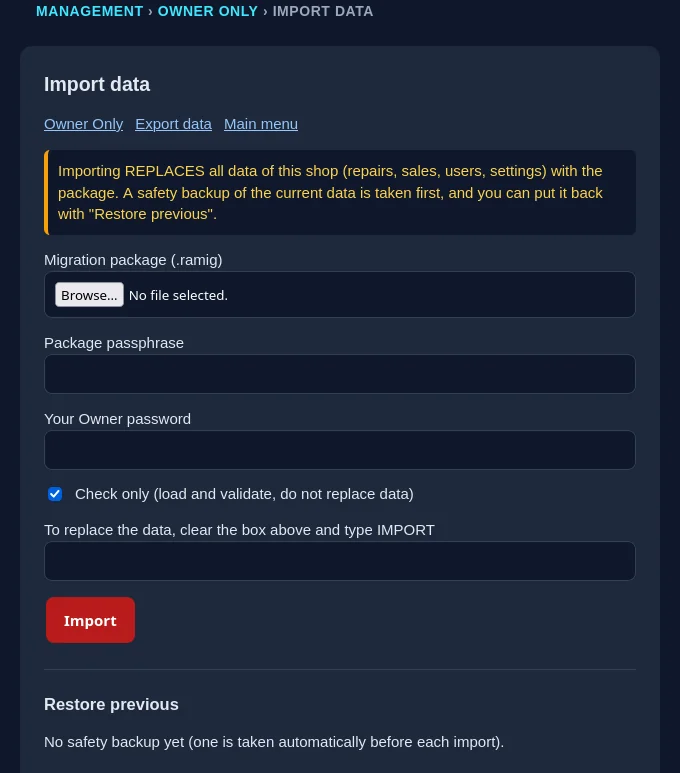
Import Data loads a migration package (.ramig) and replaces all data in this RepairAmigo:
- Choose the
.ramigfile, enter its passphrase and your Owner password. - Leave Check only ticked and click Import first. This tests the package without changing anything.
- To really replace the data, untick Check only, type
IMPORTand click Import. A safety backup of the current data is taken first, and Restore previous puts it back if needed.
Need help?
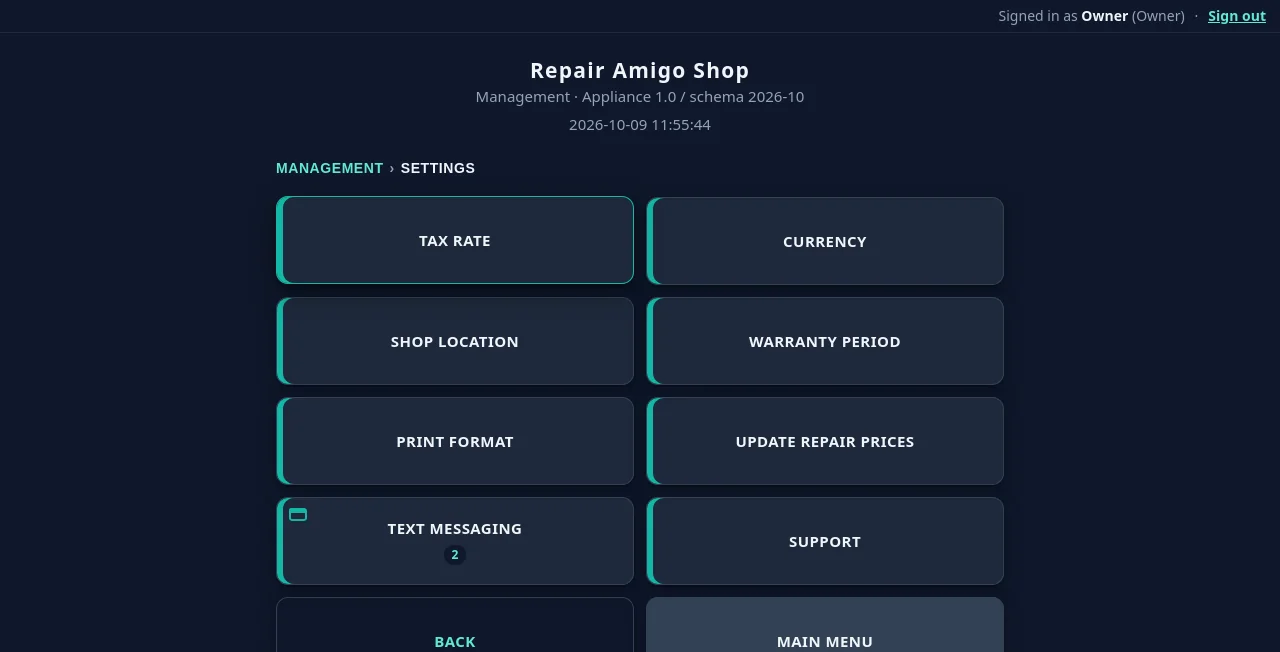
Use Request Support inside RepairAmigo (Management → Settings → Support). An Owner or a Manager types a message, and RepairAmigo’s replies appear on the same page. You can also email support@repairamigo.com. Never send customer information or passwords.
Common questions
The VM won’t start
- “VT-x is disabled” / “AMD-V is disabled”: turn on virtualization in the BIOS (step 2).
- “Physical network interface not found”: open Settings → Network and choose your network card again in Name (step 4).
- Not enough memory: close other programs so the computer has 8 GB of RAM free for the VM. RepairAmigo requires 8 GB (8192 MB); don’t lower it.
- Mac: make sure it is an Intel Mac. Apple Silicon is not supported.
- Linux: “kernel driver not installed”: reinstall VirtualBox; with Secure Boot, sign or allow its kernel modules.
I can’t open RepairAmigo from another computer
- Check that Adapter 1 is a Bridged Adapter, not NAT (step 4).
- Both devices must be on the same shop network, not a guest Wi-Fi.
- Type the full address with
http://and/repairs/inshop2/. - The IP may have changed: check the VM’s screen again, and set a DHCP reservation (step 6).
- On Wi-Fi, try a network cable. Turn off any VPN on the device you are using.
I forgot the Owner password
For security, the Owner password can’t be reset from this website. Ask a Manager to sign in and send a message with Request Support (Management → Settings → Support); RepairAmigo’s reply appears on that page. Staff who forgot their password should ask the Owner or a Manager.
RepairAmigo is slow
- Check that the VM has 8 CPUs and 8192 MB (8 GB) of memory (VM off → Settings → System).
- Make sure the host computer has free memory left over, and close heavy programs.
- Store the VM on an SSD rather than a hard drive.
- On Windows, a green turtle icon in the VM window means Hyper-V is slowing VirtualBox down. Turning off Hyper-V and Virtual Machine Platform in “Turn Windows features on or off” usually fixes it.
- Use a wired network connection for the host computer.
Do I need to keep VirtualBox open?
No. With Headless Start the VM keeps running in the background after you close the VirtualBox Manager. The host computer must stay on and awake.
How should I back up?
Export your data regularly (step 7) and keep copies on another device, such as a USB drive or a second computer. Before deleting a VM, always export first: deleting the VM deletes the data inside it.
Still stuck?
Use Request Support in RepairAmigo.